Reclaimed wood has a story to tell. Each weathered board, knot, and grain carries a bit of history, giving it a charm that’s hard to recreate with brand-new materials. If you’re looking to bring that character into your home, crafting rustic shelves from reclaimed wood is a fantastic way to do it. Not only will you end up with a functional and beautiful piece of furniture, but you’ll also contribute to sustainability by giving old wood a new life.
You don’t need to be a woodworking expert to complete this DIY project. With some basic tools and a bit of creativity, you’ll have stunning, rustic shelves ready to grace your walls. Here’s your step-by-step guide to making it happen!
Step 1: Find Your Reclaimed Wood
Reclaimed wood can come from a variety of sources. You might have some old boards lying around from a previous home project, or you can hunt for materials at these spots:
- Salvage yards: These are treasure troves of old wood from barns, fences, and furniture.
- Construction sites: Ask for discarded wooden pallets or planks.
- Online marketplaces: Check platforms like Facebook Marketplace or Craigslist for local sellers offering reclaimed wood.
- Around the house: Old furniture or shelves you no longer use can be dismantled into usable planks.
Pro Tip: Look for wood with a bit of texture and character. Nail holes, knots, and weathered edges make the final product even more charming. Just make sure the wood is free from rot or infestation.
Step 2: Gather Your Materials and Tools
Before jumping in, gather everything you’ll need for the project.
Materials:
- Reclaimed wood (choose planks thick and sturdy enough to serve as shelves)
- Wall brackets or shelf brackets (metal, wrought iron, or wood, depending on your preferred aesthetic)
- Screws or nails
- Sandpaper (medium and fine grit)
- Wood stain or sealant (optional)
Tools:
- Measuring tape
- Saw (hand saw or circular saw)
- Drill or screwdriver
- Level
Quick Note: If you’re planning to keep the wood’s natural finish, you might not need a stain. However, a sealant is a good idea to protect the wood and enhance its beauty.
Step 3: Measure and Cut Your Wood
Now it’s time to decide how big your shelves will be. Think about where you’ll place them and what they’ll hold before cutting the wood.
Instructions:
- Use a measuring tape to mark the desired length on each plank. Typical shelf lengths range from 24-36 inches, but you can customize to your space.
- Cut the reclaimed wood to size using a saw. If the edges are uneven, you can leave them as-is for a rustic, natural look, or trim them for a cleaner finish.
- Sand down the edges lightly to remove splinters.
Pro Tip: Save leftover scraps! They can be used for smaller projects like coasters, picture frames, or even bookends.
Step 4: Clean and Prep Your Wood
Reclaimed wood often comes with a layer of dirt, old paint, or debris that needs to be cleaned off.
Instructions:
- Scrub the wood gently with warm soapy water and a stiff brush. For tough stains or grime, you can use a mix of equal parts vinegar and water.
- Once clean, leave the wood to dry completely in the sun.
- If desired, sand the surface lightly to smooth out any rough spots while keeping the wood’s natural texture intact.
Optional Finish: For added protection and shine, apply a clear wood sealant or choose a stain to enhance the natural wood tones. Allow it to dry thoroughly before moving on.
Step 5: Choose Your Brackets
The brackets you use play a big part in the look of your shelves. Here are a few options to consider based on your style preferences:
- Industrial vibe: Black metal or wrought iron brackets.
- Minimalist: Invisible brackets for a floating shelf effect.
- Rustic: Wooden brackets that match or complement the shelf material.
Ensure the brackets you select are sturdy enough to hold the weight of the shelves and any items you’ll place on them.
Step 6: Mount the Shelves
With your wood prepared and brackets ready, it’s time to assemble and hang your rustic shelves.
Instructions:
- Mark the Placement: Use a pencil and level to mark where your shelves and brackets will go on the wall. Be sure to measure carefully so everything is straight and evenly spaced.
- Install the Brackets: Drill screws into the wall to secure the brackets. For heavy shelves, try to screw into wall studs for extra support. If that’s not possible, use wall anchors for stability.
- Attach the Wood: Place the wood planks on top of the brackets and secure them using screws or nails.
Pro Tip: Double-check with a level after hanging to ensure everything is even. Rustic doesn’t have to mean crooked!
Step 7: Style Your Shelves
Now comes the fun part–styling your rustic shelves! Here are a few creative ideas to make them stand out:
- Books and Greens: Stack a few of your favorite books and add a small potted plant or two for a cozy, lived-in look.
- Muted Tones: Use neutral-colored ceramic or glass jars to store items while maintaining the rustic vibe.
- Artwork and Photos: Display framed prints or photos. Lean them against the wall for a casual effect.
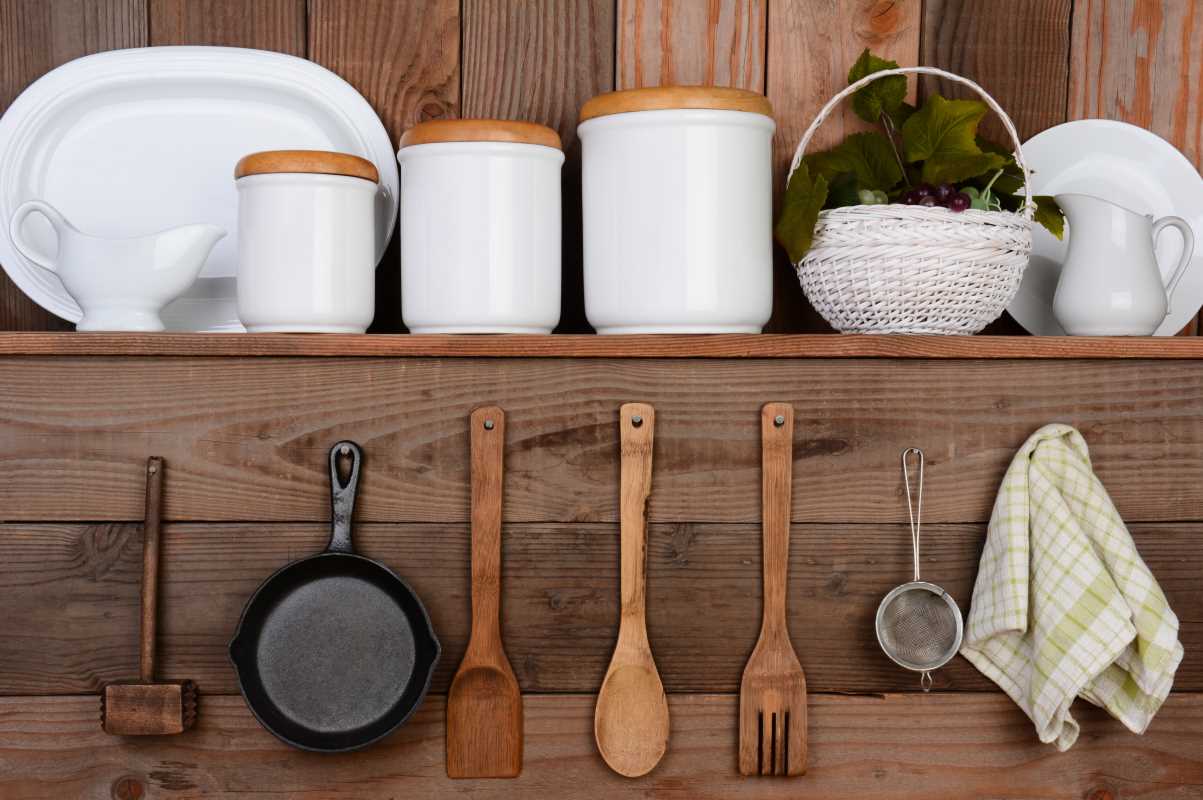
- Kitchen Charm: Use your shelves to store mason jars filled with dry ingredients, or hang mugs from hooks installed on the bottom edge of the shelf.
- Bathroom Elegance: Use smaller shelves to display rolled towels, candles, or jars of bath salts.
Quick Styling Tip: Keep the balance between functional and decorative. You don’t want your shelves to feel cluttered or too sparse.
The beauty of this project lies in its simplicity. No two pieces of reclaimed wood are alike, meaning your finished shelves will always be one-of-a-kind. Whether you hang them in the living room, kitchen, or bedroom, they’ll bring a touch of warmth and personality to any space.
 (Image via
